

As a server administrator I find it a real nightmare securing and monitoring various WordPress installations, and one of my life goes has always been to protect systems such as WordPress from the core of the server rather than relying on manually modifying .htaccess or code, or using plugins (as would be the case for WordPress).
Luckily using Mod Security and ConfigServer Firewall automation is possible, if not tricky because you need to monitor processes and devise solutions to best secure features for various systems and services.
We created this little solution for protecting WordPress Admin Panel access, in-fact it will protect everything going through wp-login.php which includes admin and user logins. It doesnt matter if a WordPress site has changes /wp-admin/ or /wp-login/ as the detection works directly on the wp-login.php file.
If you have a WHM server with ModSecurity and ConfigServer Filewall then just follow our guide below to implement the best brute force security for your WordPress sites possible, no need for plugins or complex .htaccess tricks any longer!
First Things First
You will want to make sure your server is using ModSecurity and if not you will need to re-compile apache to use ModSecurity. Run the following command and if there are results then you have it enabled.
grep "modsecurity" /usr/local/apache/logs/error_log
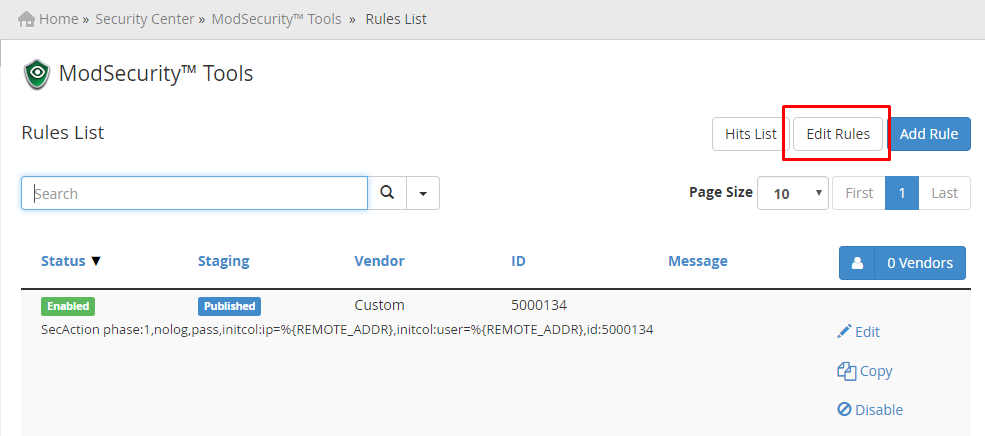
Secondly you will need to find where your ModSecurity configuration file is, On newer WHM systems you can edit the config file directly using the ModSecurity Tools Panel. Take a look at the illustration below and check if your WHM has this panel, if so ignore instructions for finding and editing the config file and instead add the rules through this panel.


If you are not fortunate to have the admin panel approach the configuration files is usually located at either location:
/usr/local/apache/conf/modsec2.user.conf

/etc/apache2/conf.d/modsec2.user.conf
If it is not there try running the below command in SSH to find where the file is:
find / -name modsec2.user.conf
Configure ModSecurity Rule
Once you have found your modsec2.user.conf file, you need to edit it with your favourite editor, we prefer nano so our command is as follows:
nano /etc/apache2/conf.d/modsec2.user.conf
If you were fortunate enough to have the ModSecurity Tools panel, then follow the 3 steps in the images above.
Then go ahead and add our new custom rule to the bottom of this file:
SecUploadDir /tmp
SecTmpDir /tmp
SecDataDir /tmpSecRequestBodyAccess On
SecAction phase:1,nolog,pass,initcol:ip=%{REMOTE_ADDR},initcol:user=%{REMOTE_ADDR},id:5000134
<Locationmatch "/wp-login.php">
# Setup brute force detection.# React if block flag has been set.
SecRule user:bf_block "@gt 0" "deny,status:401,log,id:5000135,msg:'ip address blocked for 5 minutes, more than 10 login attempts in 3 minutes.'"# Setup Tracking. On a successful login, a 302 redirect is performed, a 200 indicates login failed.
SecRule RESPONSE_STATUS "^302" "phase:5,t:none,nolog,pass,setvar:ip.bf_counter=0,id:5000136"
SecRule RESPONSE_STATUS "^200" "phase:5,chain,t:none,nolog,pass,setvar:ip.bf_counter=+1,deprecatevar:ip.bf_counter=1/180,id:5000137"
SecRule ip:bf_counter "@gt 10" "t:none,setvar:user.bf_block=1,expirevar:user.bf_block=300,setvar:ip.bf_counter=0"
</locationmatch>ErrorDocument 401 default
Breakdown
Firstly note that we are setting SecUploadDir, SecTmpDir and SecDataDir to /tmp, you should change this to the location of your temp directory.
The next line is really vital for the operation of the ruleset, SecRequestBodyAccess on tells ModSecurity that we would like to look at the Body of the HTTP transaction.
<Locationmatch "/wp-login.php">
The next part we use Apache’s LocationMatch to determine if it is in fact /wp-login.php that the person is accessing. Because the /wp-login.php is parsed as RegEx it WILL match sub-directories, and other nested directories as either way the /wp-login.php will always be in the URL.
SecRule user:bf_block "@gt 0" "deny,status:401,log,id:5000135,msg:'ip address blocked for 5 minutes, more than 10 login attempts in 3 minutes.'"
SecRule user:bf_block "@gt 0" "deny,status:401,log,id:5000135,msg:'ip address blocked for 5 minutes, more than 10 login attempts in 3 minutes.'"
The code above will check if the block flag was set, and if so, it will deny with status 401 and log to ModSecurity log with the message you see above.
SecRule RESPONSE_STATUS "^302" "phase:5,t:none,nolog,pass,setvar:ip.bf_counter=0,id:5000136"
This section of the code will check if the response status is 302, which would be the status response for a successful login, this will then set the bf_counter to 0 as the user logged in, and chances are this was not a brute force attempt.
SecRule RESPONSE_STATUS "^200" "phase:5,chain,t:none,nolog,pass,setvar:ip.bf_counter=+1,deprecatevar:ip.bf_counter=1/180,id:5000137"
This will check if response status is 200 which means there was a failed login attempt. When this is detected it will increase the bf_counter to keep track of how many failed login attempts there were.
SecRule ip:bf_counter "@gt 10" "t:none,setvar:user.bf_block=1,expirevar:user.bf_block=300,setvar:ip.bf_counter=0"
This checks the count of the bf_counter for the user’s IP, if it’s greater than 10 (means 10+ failed login attempts), then we need to block this user’s IP.
ErrorDocument 401 default
Setting ErrorDocument 401 default at the bottom of the file will direct Apache to direct any 401 errors away from the WordPress installation. This should help alleviate extra load on the server by having Apache serve 401’s with default handling, whereas if you did not include this (and did not have it in your .htaccess file), WordPress would handle the 401 error.
Customizing The Rules
The code above is set to block the IP for 5 Minutes after 10 Failed Login Attempts within 3 Minutes, you can change this by modifying the following values:
Change Block Time Length
Find this value user.bf_block=300 which is in the last SecRule inside the Locationmatch, and change 300 to however many seconds you want to block the IP for. So if you wanted to block for 10 Minutes, change this value to 600.
Change Amount of Failed Logins
Find this value "@gt 10" which is in the last SecRule inside the Locationmatch, and change 10 to the amount of failed logins required before blocking the IP. So if you wanted to block after 5 failed login attempts, change 10 to 5.
Change Failed Login Period
Find this value ip.bf_counter=1/180 which is in the Second to last SecRule inside the Locationmatch, and change 1/180 to how many seconds you want to track the login attempts for. Say you wanted to change it so the 10 failed login attempts could be within a period of 10 minutes, you would change 1/180 to 1/600.
Make Sure ModSecurity is Enabled on ConfigServer Firewall
This is incredibly important, you need to make sure ConfigServer Firewall is actually looking at your ModSecurity Rules, if it isnt then nothing above will work.
Go to ConfigServer Firewall in WHM (usually at the very bottom). Click "Edit Configuration" and find LF_MODSEC. Make sure this is set to anything other than 0 and restart LFD/CSF.
 Twitter
 Facebook
 Linkedin
I find that after installing ModSec, the admin panel breaks on sites. What happens is, a user goes to edit a post - makes the changes and then presses UPDATE. At this point, they are taken back to the front page of the front end of the website.
It's not until I whitelist the domain from ModSec that this is fixed - though this isn't the best solution. I'm yet to work out how to fix this properly.
Hi, do you have experience in WHM? I have modsecurity and although is saving in the log the atacks, it is not blocking anything. I have investigated in forums, reddit, etc and I can´t find the cause.
Thanks,
Francisco
Big delay in responding here, sorry about that but yes I do, Id have to take a look but guess you got this sorted by now. Sorry again.
Hi Dean, I could fix it. It was finally some rules whitelisted inside mod_security.
Thanks,
Francisco